
Switching banks may sound like a lot of work, but it’s probably less steps than you think. And our hassle-free guide is here to help!
You’ll see that it’s not really the amount of work, but more about doing things in the correct order. And, taking a few steps to switch banks may really pay off in terms of improved service and products. Because accepting mediocre banking isn’t for you! You deserve better.
We’ve laid out five steps to follow so the switch goes flawlessly:
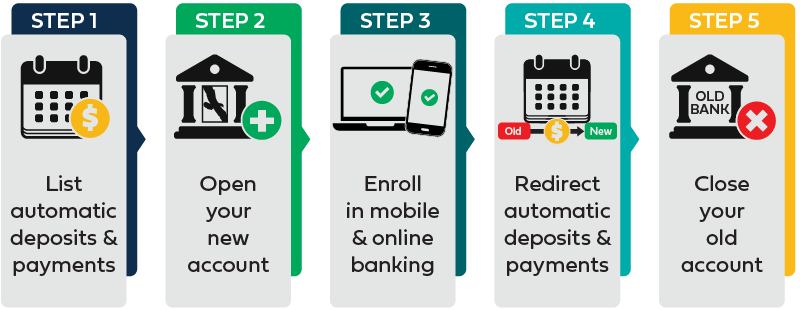
Step 1: List automatic transactions and direct deposits
The first step in switching banks is to take inventory of any automatic transactions and direct deposits. For example, your employer might deposit your paycheck directly into your account at the end of each pay period. Or you might be enrolled in auto pay, so you never miss a payment for things like your internet. These services greatly simplify your financial life. So it’s essential you accurately list incoming and outgoing transactions you’ll need to update once your new account is active.
Our best advice is to take a look at more than a single month’s worth of expenses. Some automated transactions may occur quarterly, semiannually or annually.
As you plan to make the switch, here are items you should keep track of:
- Automatic deposits - including direct deposit of paychecks or business income, alimony or child support payments and government benefit payments like Social Security
- Automatic bill payments - including mortgage, utilities, credit cards and student loans
- Recurring subscription payments - like streaming services or gym memberships
- Recurring transfers to and from external accounts - like an individual retirement account or a health savings account
It’s also a good idea to make note of any places where your current bank accounts are linked, especially if you regularly shop online. This includes items like your mobile wallet app, Venmo and Paypal. You’ll need to update these services with your new bank account or debit card information once your account is open.
While this step takes a little more time, it’s worth the effort to avoid bounced checks or refused payments that may result in fees or services to be paused.
Step 2: Open your new account
At The Bank of Missouri, it’s easy to open an account that fits your life. You can apply online in minutes, without ever leaving your home. Or if you’re looking to get started in person, you can visit your nearest Bank of Missouri branch. One of our teammates is happy to walk alongside you and get you all set up.
To open a new bank account, you’ll need:
- Social Security number
- Valid ID (driver's license, state ID or passport)
- Home address (not a P.O. Box) – Note, if your current address does not match your driver’s license, then you’ll need proof of residency, as well.
You’ll also be asked for your date of birth, phone number and email address. This is all a part of a crucial step in confirming your identity.
As a part of the account opening process, you’ll need to plan on funding the account. At The Bank of Missouri, the minimum amount to open a new checking account is $100. If you’re making the switch online, you’ll simply transfer funds electronically from an existing account at another financial institution. Be sure to have that account login handy. If you’re opening the account in person, you can use cash, check or money order.
Step 3 – Enroll in mobile and online banking
Now that you’ve got your new account, the next best step is to ensure you can access your money easily and on the go. Our digital banking tools are designed for lives in motion. With mobile and online banking at The Bank of Missouri, you can bank anywhere. Manage transactions, make transfers, pay bills, deposit checks, control your debit card, set budgets and more.


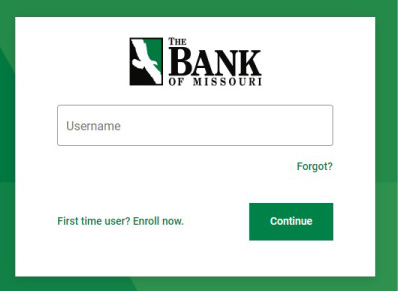
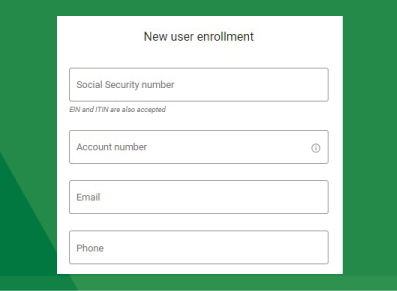
It’s easy to get digital access to your accounts. First time users can simply navigate to our online banking portal or download The Bank of Missouri app in your phone’s app store. Then click “First Time User? Enroll now.” To verify your identity, you’ll need to then plug in your Social Security number, your new account number, and the email and phone number used to open your account.
Step 4 - Redirect your automatic payments and direct deposits
Once your new account is open and funded, it’s time to begin making the switch. Using the list you put together in step 1, you’ll transfer those automatic transactions from your previous account.
At this point, it’s a prime time to take a hard look at your recurring payments. Are there any you might want to cancel outright, like a subscription service you’re no longer using? As you’re switching banks, getting rid of these payments is a perfect money saving opportunity.
After you’ve given your list some consideration, you’ll want to start with updating your direct deposits. To ensure your paycheck goes to the right place, you can typically change your payroll direct deposit using the payroll provider’s website. If not, you’ll likely contact your human resources department with your new account information. Other direct deposits like child support, alimony payments or government benefits will each need to be updated separately.
You’ll also want to set up automatic bill payments through your new bank account. You can simply do that using The Bank of Missouri’s online and mobile banking. Be sure to update old account information stored with any service providers, like your credit cards, cable company and cell phone provider. Not all merchants will notify you if a payment fails. So, this step is crucial to make sure your bills aren’t late or pile up.
Step 5 – Close your old account
Cutting ties from your old bank is your very last step. But, our bankers recommend avoiding rushing to close it.
Your best bet is to keep your old account up and running for an additional statement cycle or two. This is key to ensuring that you have enough time to adjust for any overlooked one-off bill payments that are automatically drafted from your checking account. Once you’re sure all direct deposits are coming in and automatic payments are going out of your new account, transfer any remaining money.
To close your old account, you may be able to do this in person, online or over the phone, depending on the bank’s procedures. The Consumer Financial Protection Bureau recommends getting a written document confirming that an account has been closed. This helps protect you from becoming a victim of fraud.
Finally, cut up or shred any debit cards or checks associated with your former banking institution.
Now, you’re ready to enjoy your new bank! A great first move is getting familiar with the mobile banking app, so you can keep a close eye on balances and transactions. In The Bank of Missouri’s app, you can add payees and make payments all right from your phone, too.
Once you’re through the basic steps of getting going with a new checking account, we’re here for the next steps. With savings accounts, home loans, car loans and business services, our team works with you to find the solutions that can help you reach your financial goals. Let’s connect to create a customized plan.